March 15th at 7:00 p.m. - Shaving Cream Technique Class
During the past two technique classes we have been practicing a technique with a couple samples and then everyone has made a complete card. Since you do not need a lot of practice with this technique, we will make two simple cards.
March 29th at 7:00 p.m. - In-Color Class
The combination of In-Colors are so pretty this year. At this class we will be making three cards that focus on the In-Colors.

Saturday, February 18, 2012
Emboss Resist
February's technique class featured the emboss resist technique. There are many different ways to use this technique. Before making the card, we practiced several times.

For this sample, we stamped the flower from Friends Never Fade with Versa Mark on Whisper White card stock. Some of us used white embossing powder, while others used clear embossing powder. Either colors would work for this sample because the card stock is Whisper White. If you want a white image on colored card stock, you would need to use white embossing powder. The clear embossing powder allows the color of the card stock to show through.
After setting the embossing powder with a heat tool, we used a sponge dauber and Calypso Coral ink to color over and around the flower. (You want to color over the flower to get the ink in the areas that weren't stamped.) After inking, use a tissue and gently wipe over the stamped image in a circular motion.
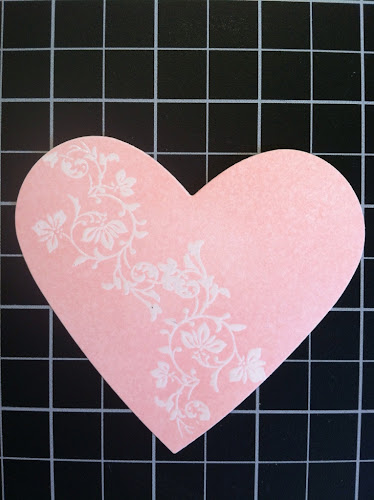
This sample was cut using the new Heart Framelit die. The filagree stamp from Vintage Vogue was inked with Versa Mark and stamped twice on the heart. Clear embossing poweder was used. After heating, Blushing Bride was sponged on the heart and wiped with a tissue.
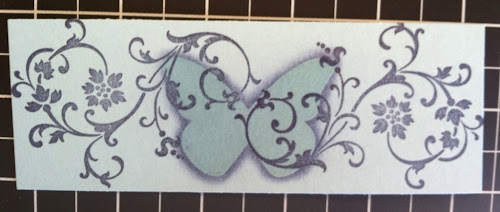
Night of Navy ink was stamped on Baha Breeze card stock with the filagree stamp from Elements of Style. The butterfly was stamped with Versa Marke and embossed with clear embossing powder. After heating, the butterfly was outlined with Night of Navy ink using a Q-tip. Finally, wipe the butterfly with a tissue.

After all that practice, we made this card. Below are the steps to make the card.
- Using Versa Mark, stamp the large flower from Vintage Vogue twice on Whisper White card stock.
- Emboss with white embossing powder and heat set.
- Using the small flower from Vintage Vogue and Crumb Cake ink, stamp off before stamping the flower on the Whisper White card stock.
- Emboss the left side of the Whisper White card stock with the Perfect Polka Dots embossing folder.
- Using a sponge dauber, sponge over the large flower, the polka dots, and anywhere else you want the ink.
- Use a tissue to wipe over the large flower before using the fliagree stamp. If you wipe after stamping, the Cherry Cobbler ink will smear!
- Adhere the Chery Cobbler seam binding beore assembling the rest of the card.
- Stamp a sentiment on Whisper White card stock and punch with the Large Oval punch. Sponge around the edges with Cherry Cobbler ink.
- Punch out a Scallop Oval with Crumb Cake card stock and adhere the sentiment with a dimmensional.
- Finally, add pearls in the middle of the flowers.
Friday, February 17, 2012
Masking

This was the card we made at the Masking Technique class.
- To get the butterfly images on the Marina Mist card stock, two butterflies were used from the hostess set, Precious Butterflies. Versa Mark was used to create the images.
- The new Labels Framelits dies were used to create the Early Espresso and Whisper White layers.
- The Beautiful Butterflies Big Shot Die used to make the template for the masking.
- After using Post-Its to temporarily adhere the butterfly to the Whisper White card stock, sponge Wild Wasabi on the bottom of the card stock and Marina Mist on the top of the card stock. Stamp the flowers from Just Believe with Early Espresso ink onto the card stock.
- Adhere the Whisper White card stock to the Early Espresso card stock.
- Use dimmensionals to adhere to the Marina Mist card stock.
- Stamp a sentiment onto Whisper White card stock and punch with the Word Window punch.
- Sponge the edges with Early Espresso ink.
- Add a small Wild Wasabi butterly cut from the Beautiful Wings Embosslit die and adhere the sentiment with dimmensionals.
Subscribe to:
Posts (Atom)